All Guides
Record first meeting
Learn how to record your first meeting with Finobi
Starting a Immeditate Meeting
Step 1: Go to the meeting-assistant page and Meeting Event Title

In the Finobi dashboard, navigate to the "meeting-assistant" page. and in the Meeting Event Title, you will have different icons for a unique purpose.
Step 2: Starting a Immediate Meeting

Click on the "Start Immediate Meeting" button to begin the meeting.
Step 3: Meeting Started

A Recording Bottom pane will be shown. You can start recording by clicking on the "Record" button.
Step 4: Recording Started

Recording will start after the play button is clicked. You can stop recording by clicking on the "End Meeting" button.
Step 5: Recording Paused

You can pause the recording by clicking on the "Pause icon" button. The recording will be paused and the meeting will be continued from the same point.
Step 6: Recording Stopped

Once the recording is stopped, you have a 15 second window to continue the recording and the meeting will be continued from the same point. If you do not continue the recording, the recording will be stopped and the meeting will be ended.
Scheduling a meeting from Finobi
Step 1: Create a meeting event
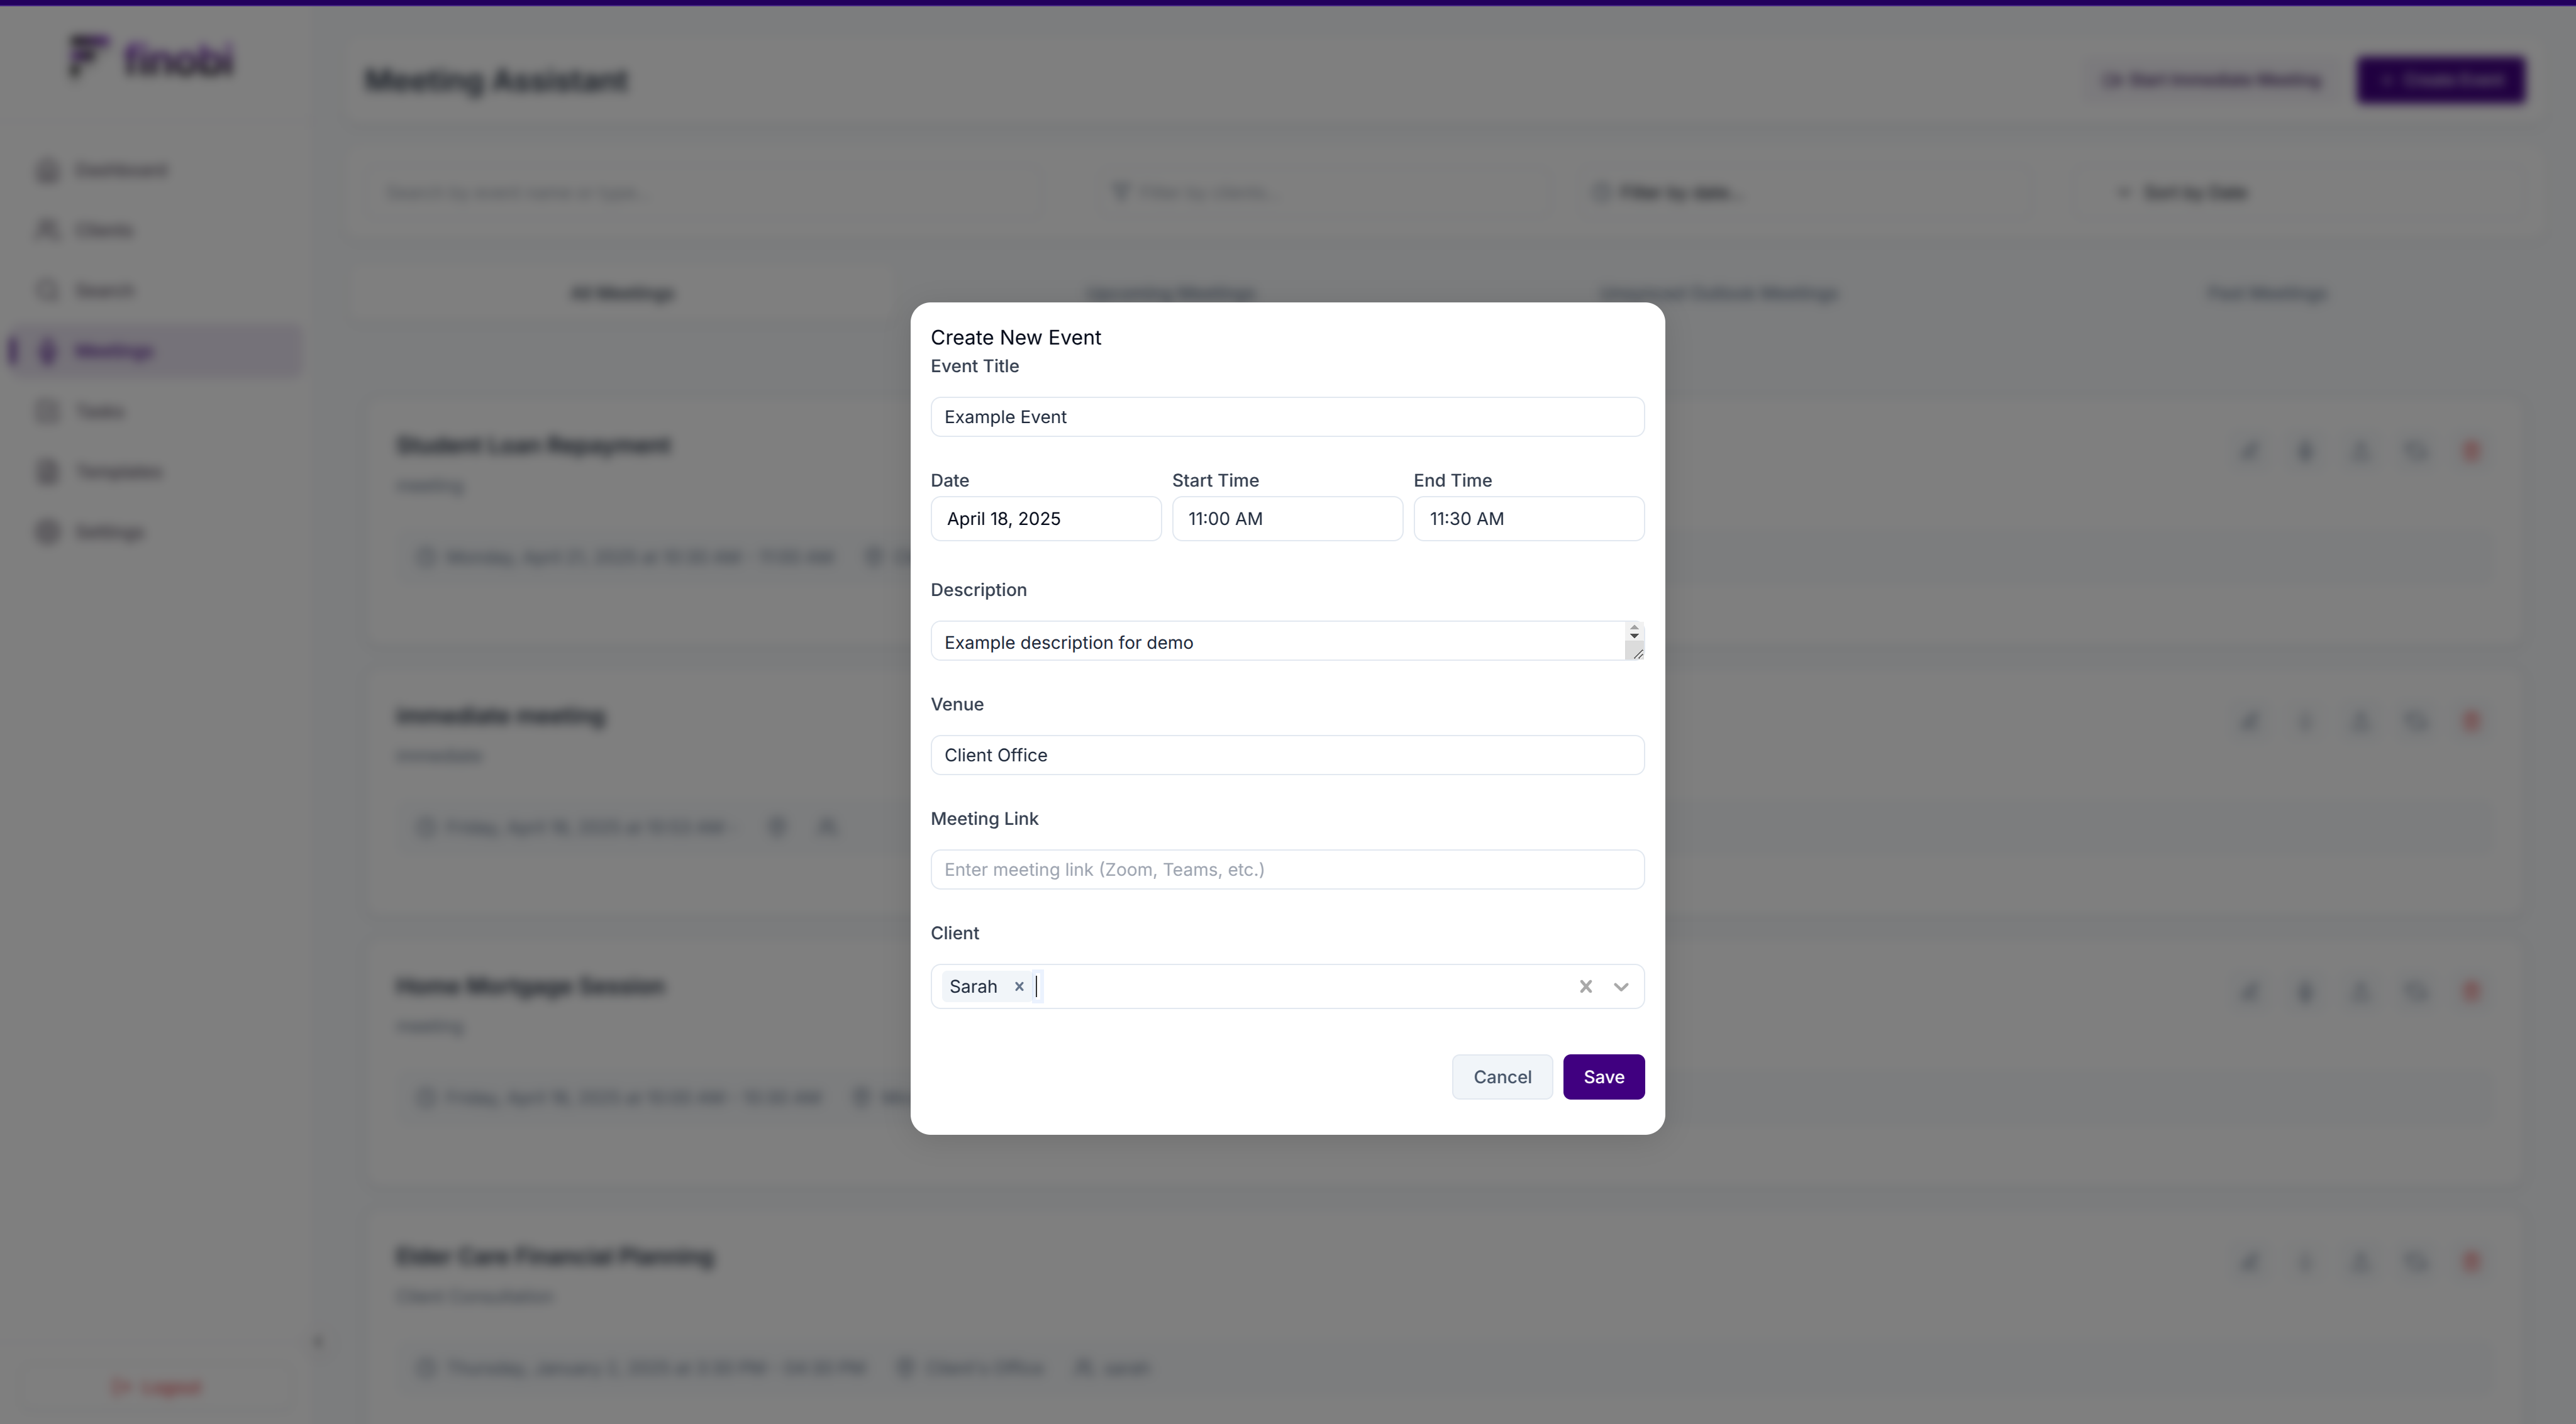
You can create a meeting event by clicking on the "Create Event" button.
Step 2: Uploading a Audio File
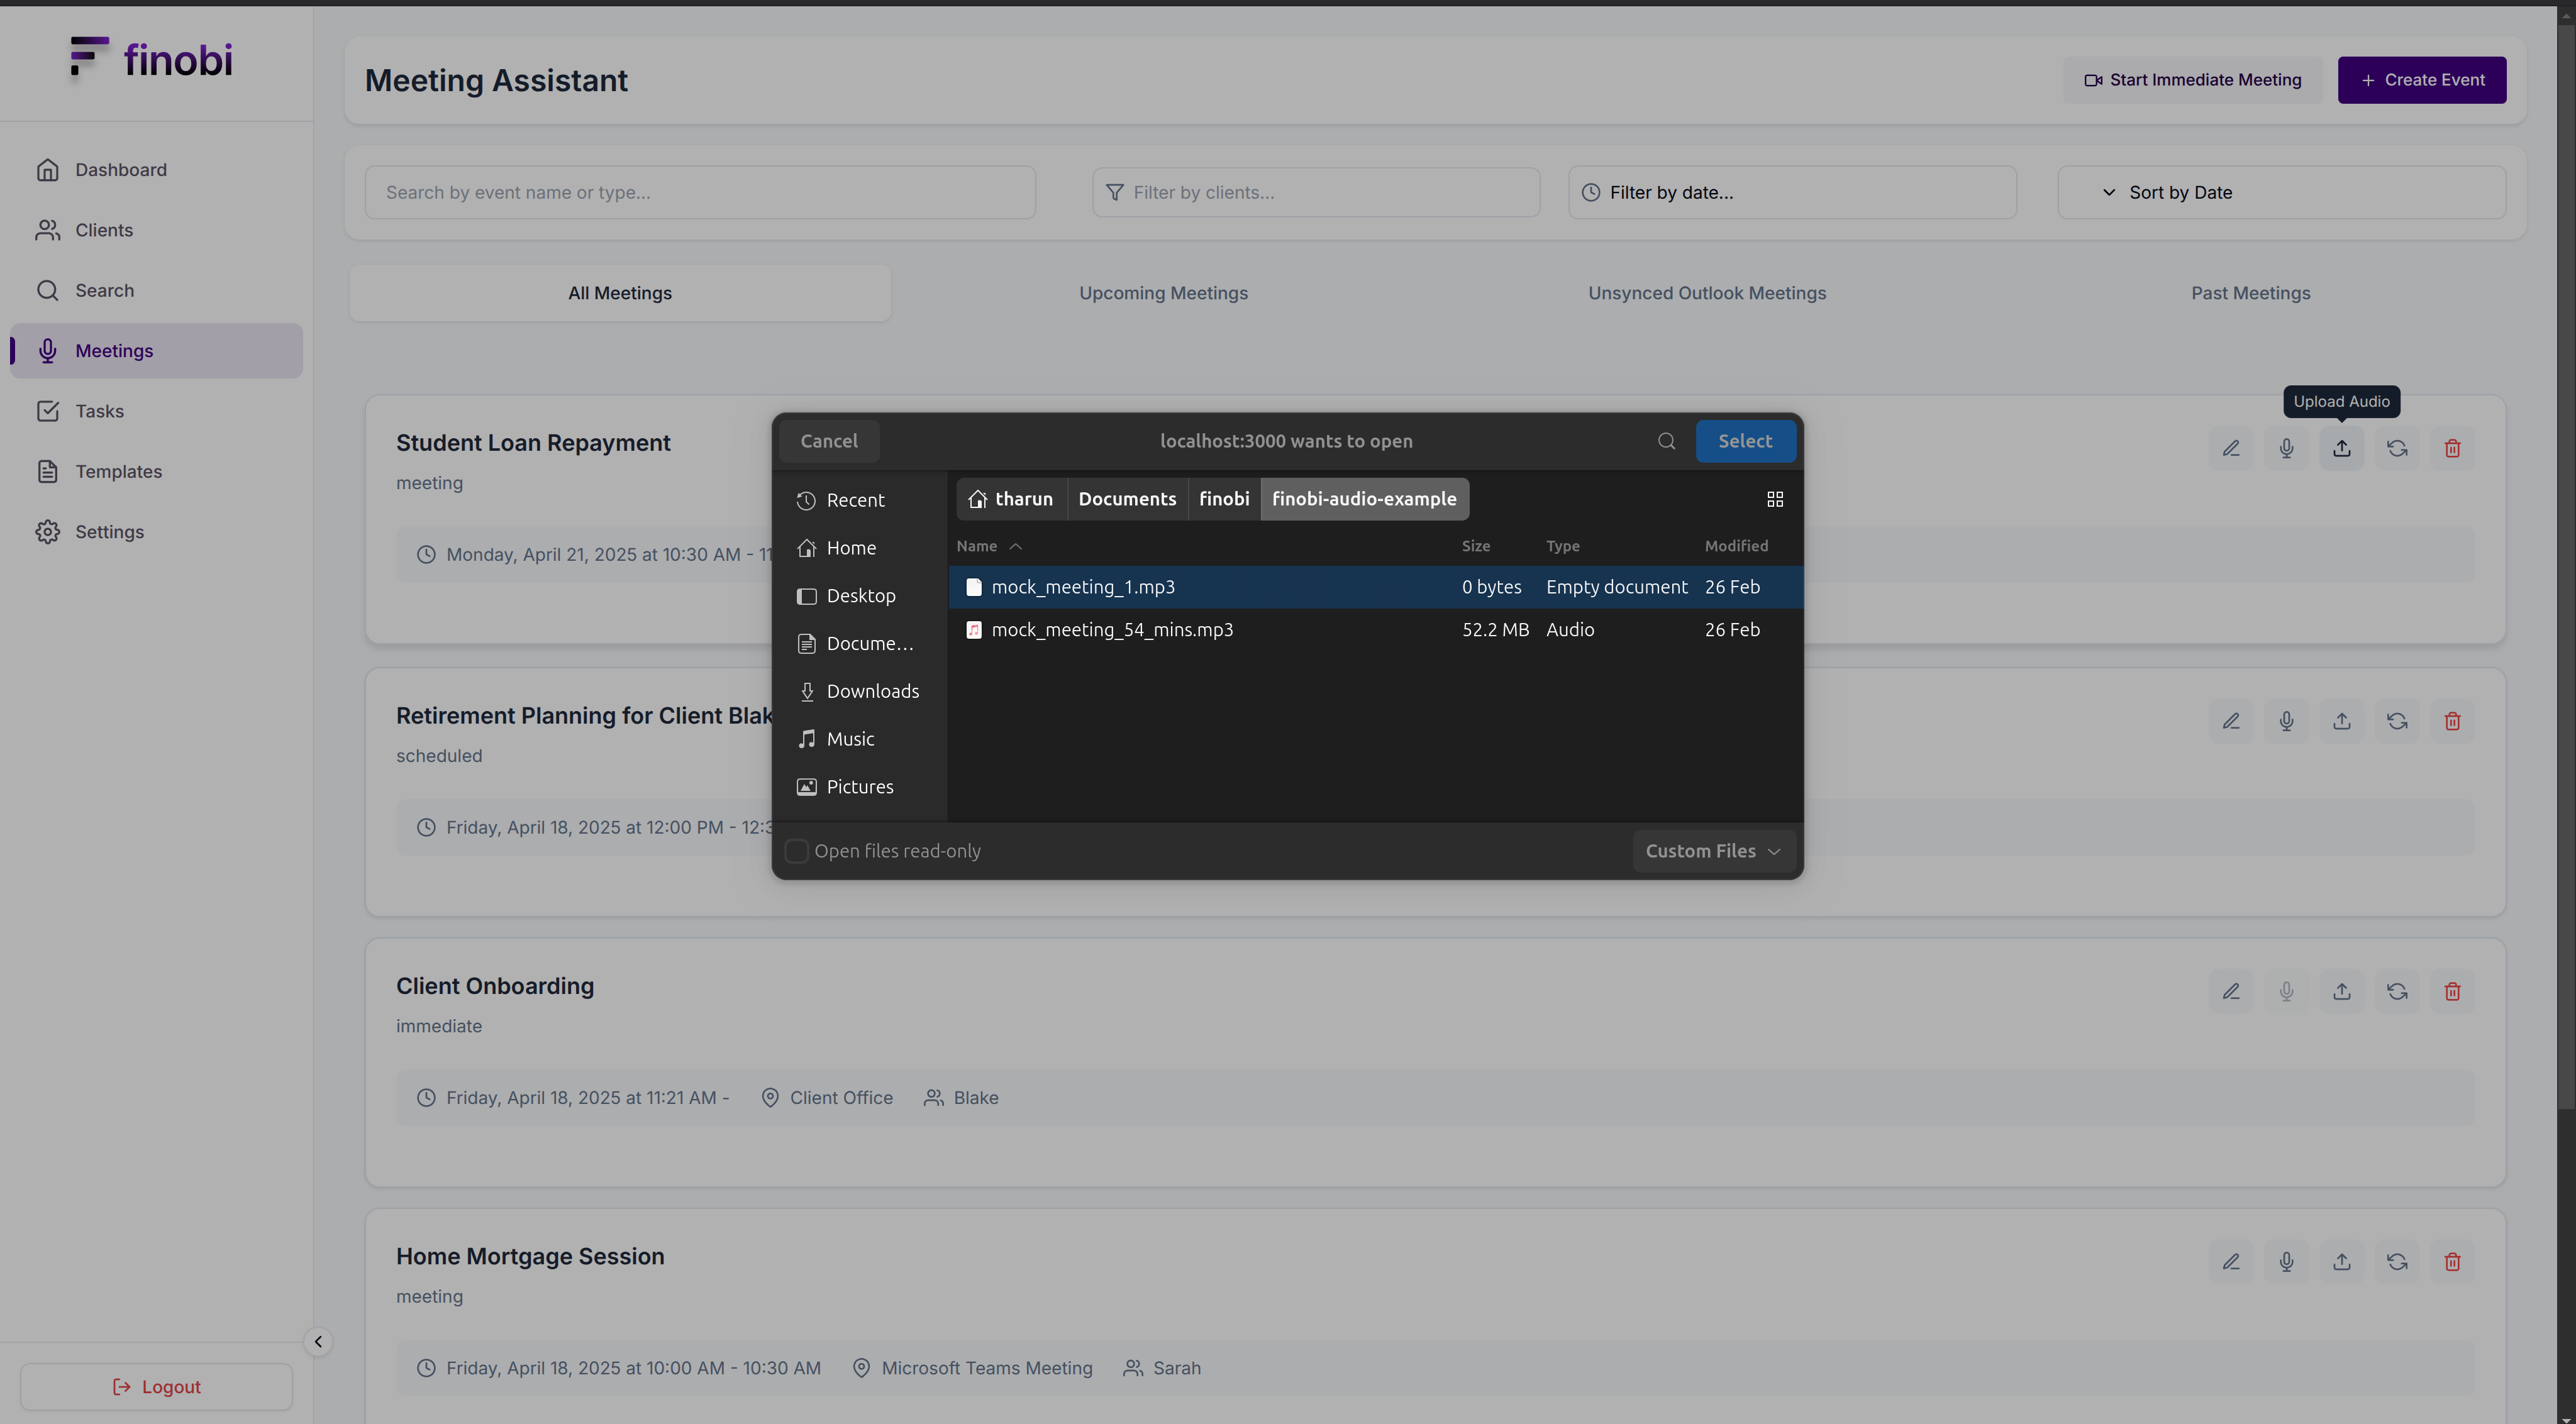
You can upload a audio file by clicking on the "Upload Icon in the Meeting Event" button.
Step 3: Adding Meeting Url
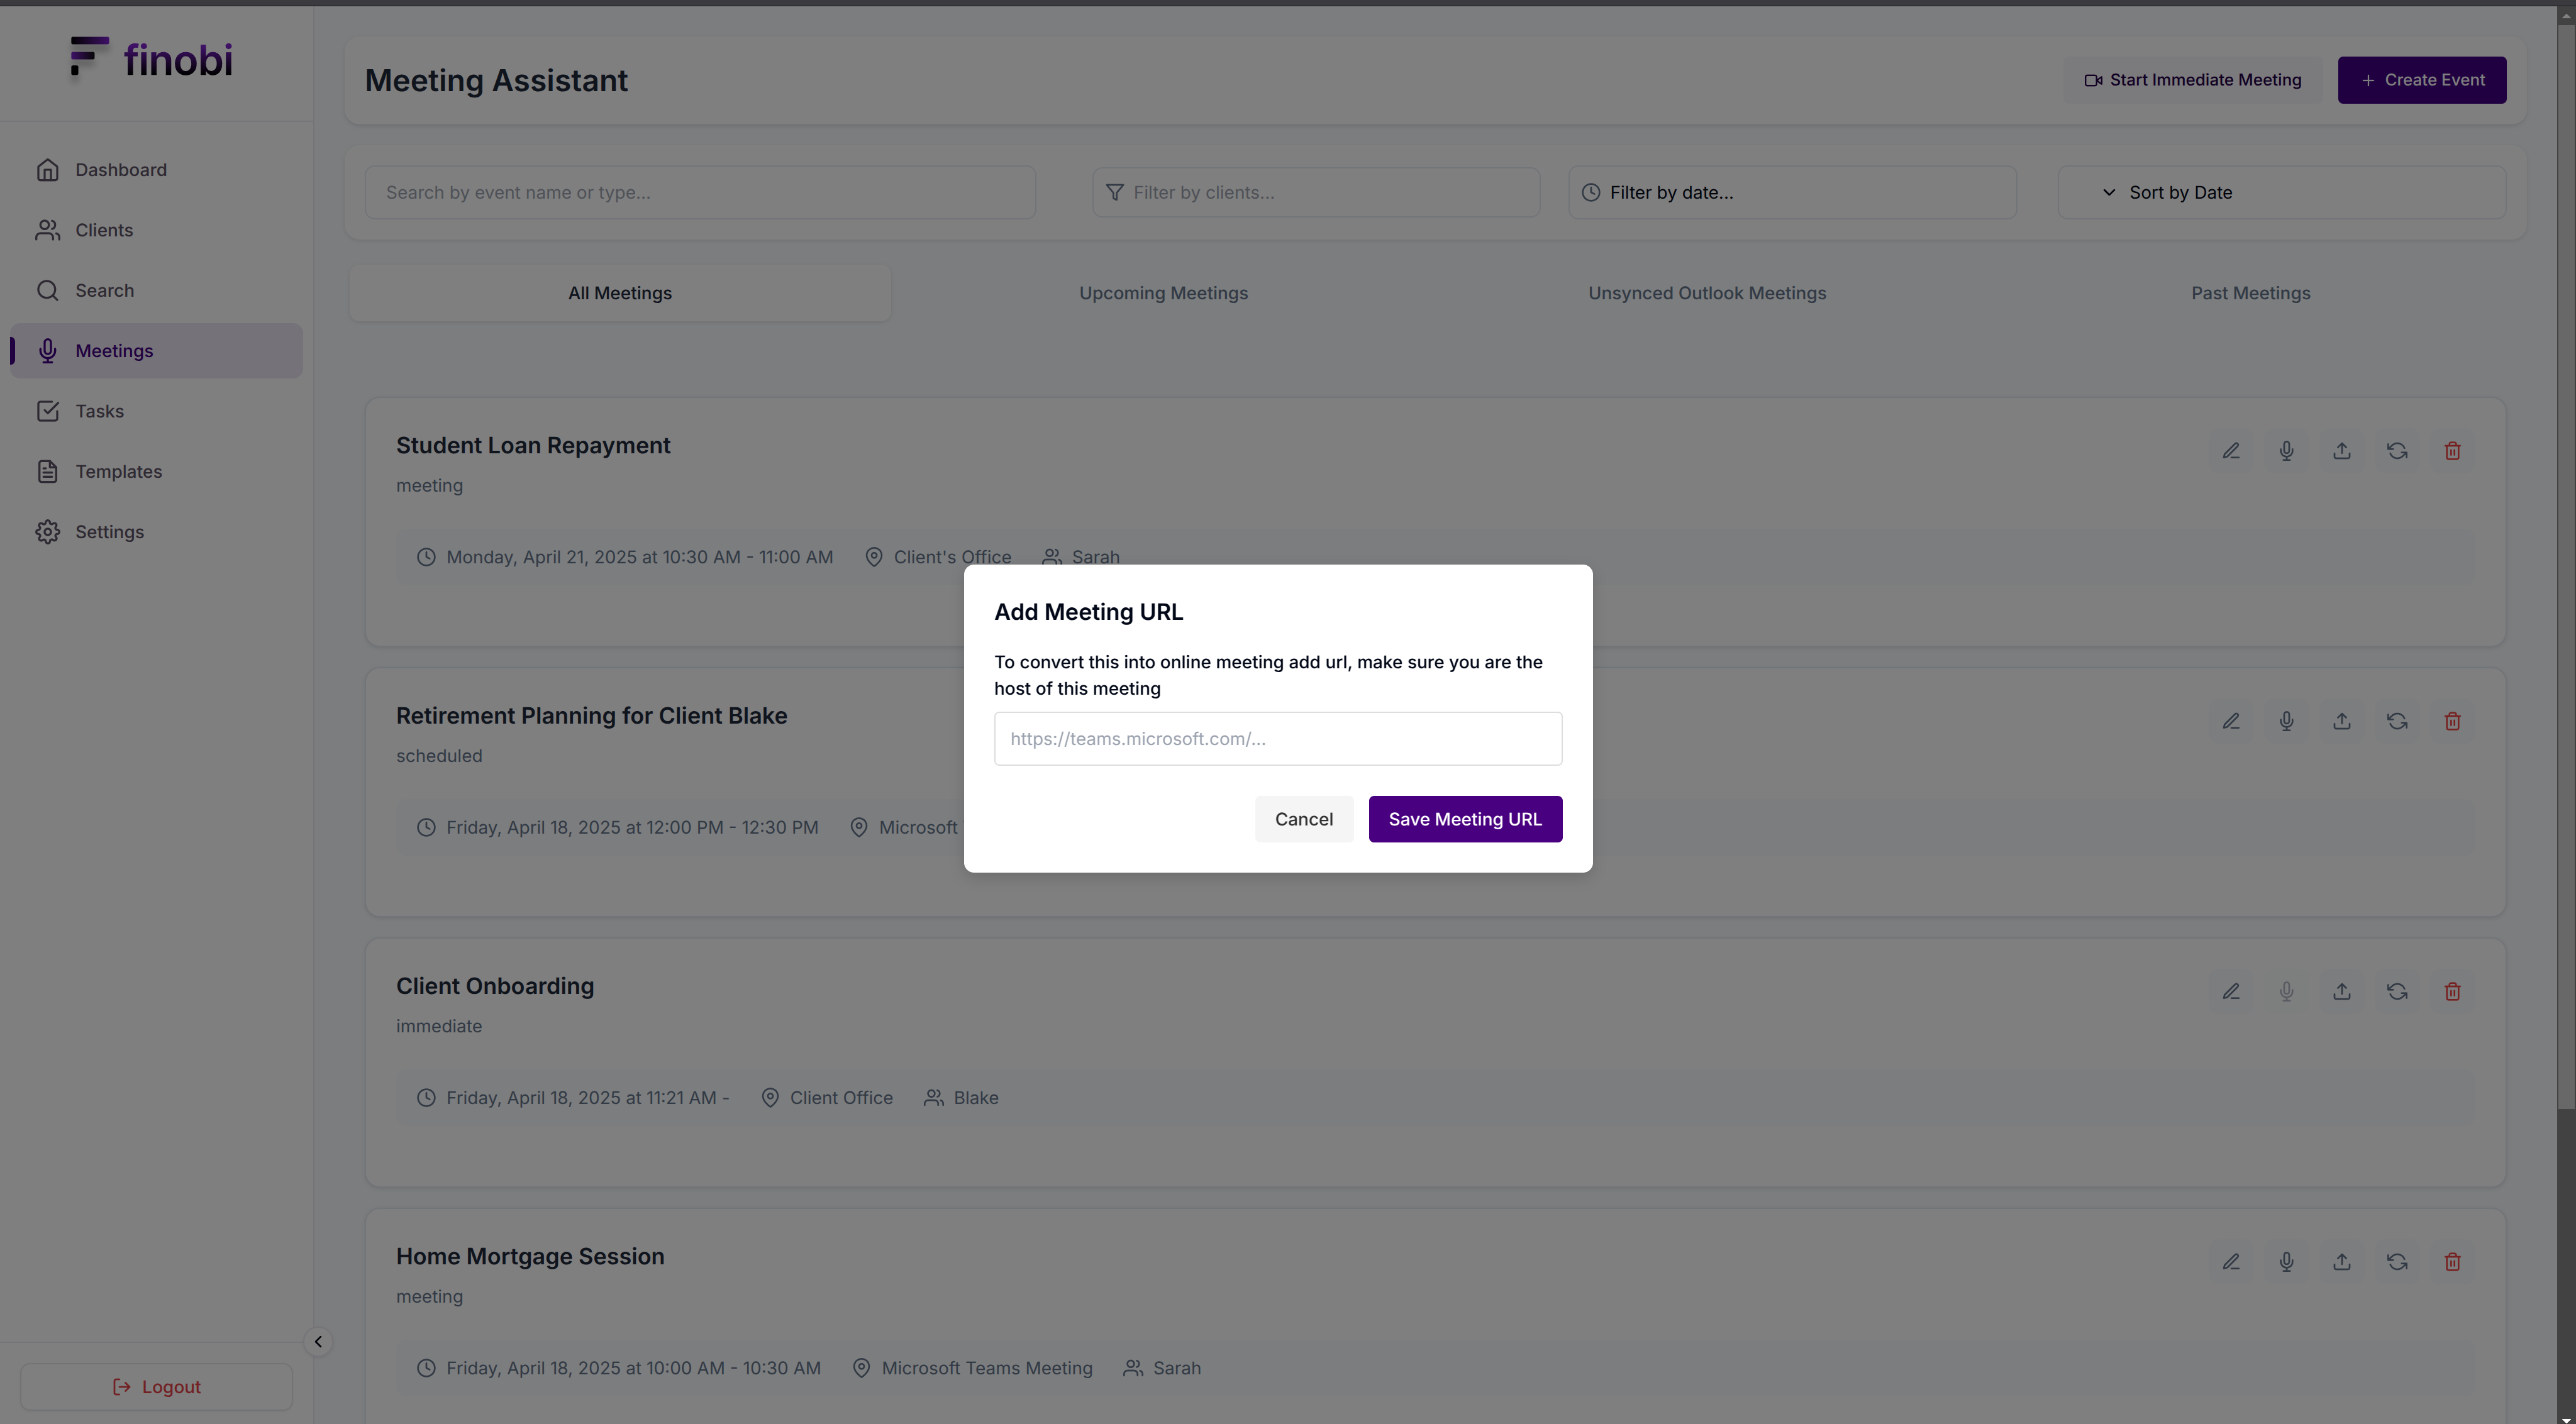
You can add a microsoft teams meeting url by clicking on the "sync icon" button in the meeting event title
Step 4: Confirm microsoft teams meeting syncing
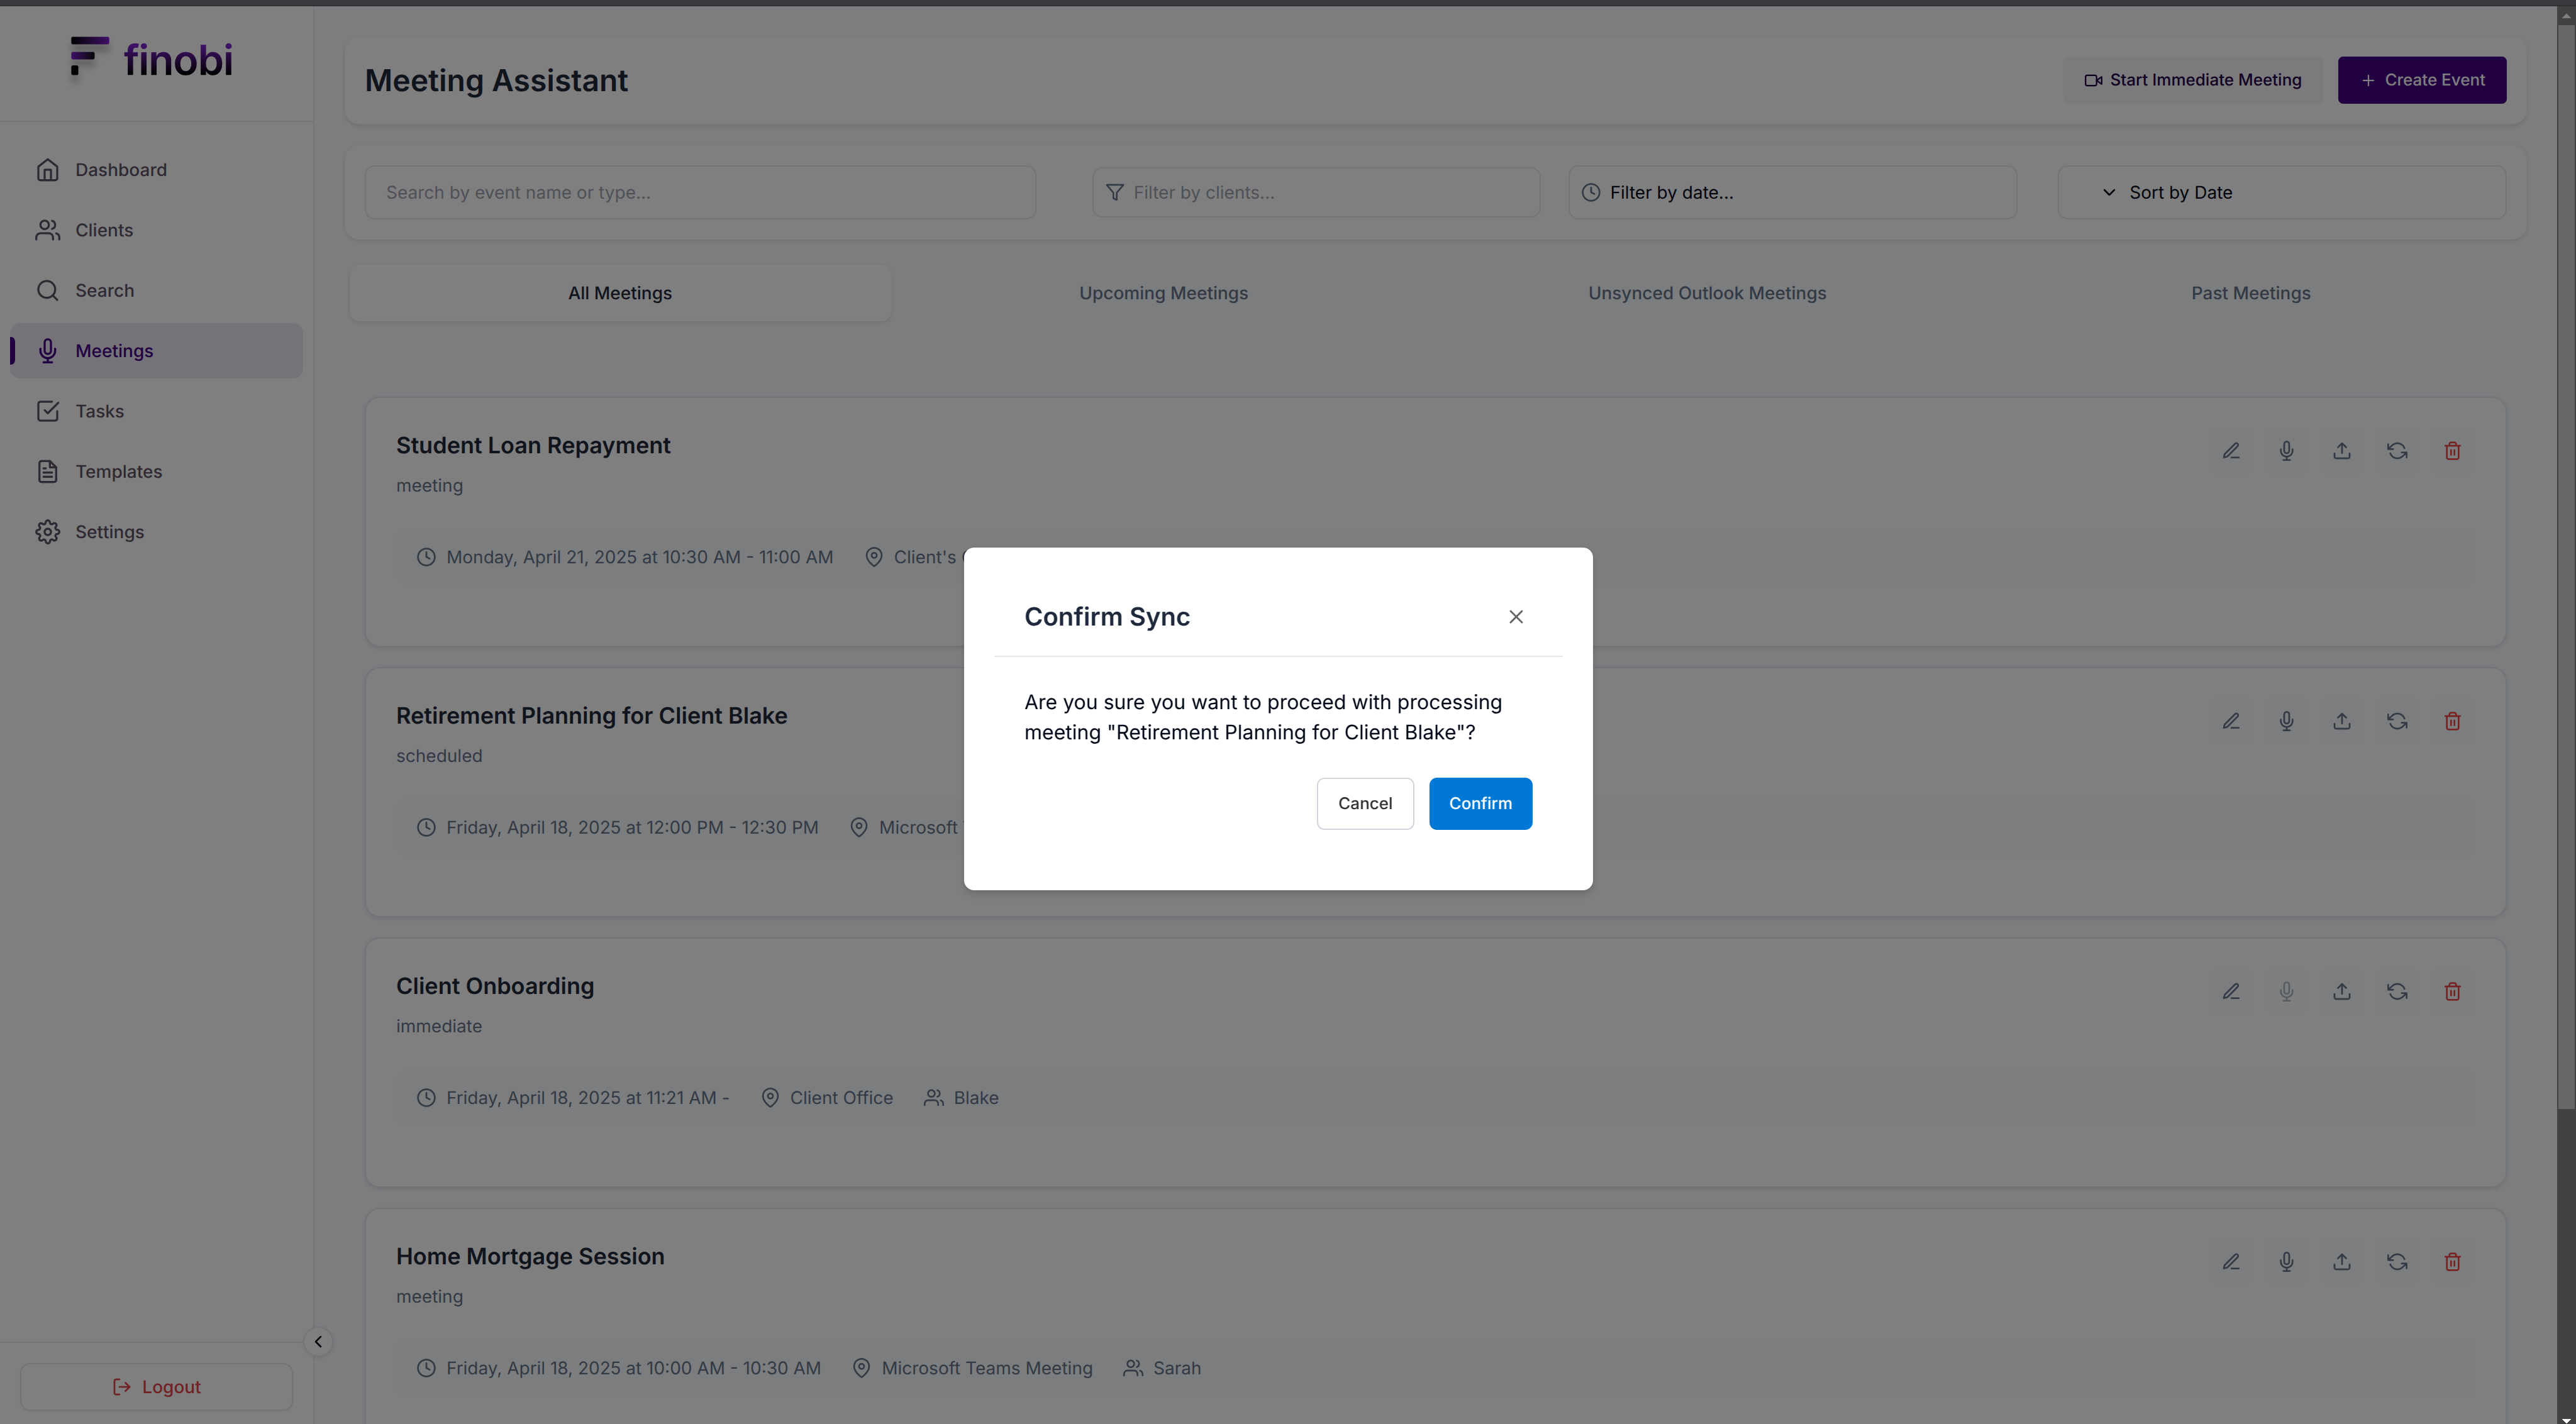
A pop up will be shown. Click on the "Confirm" button to sync the meeting.